Home project – Wall removal

Though I love my little house, I seem to be constantly looking for areas to change that firstly add to my enjoyment of the home and secondly, to add value. Creating equity is important to me for next steps in my financial journey.

I currently own a 60 year old weatherboard home. My best guess is that much of the internal layout is original. The Living area is separate to the living and dining.

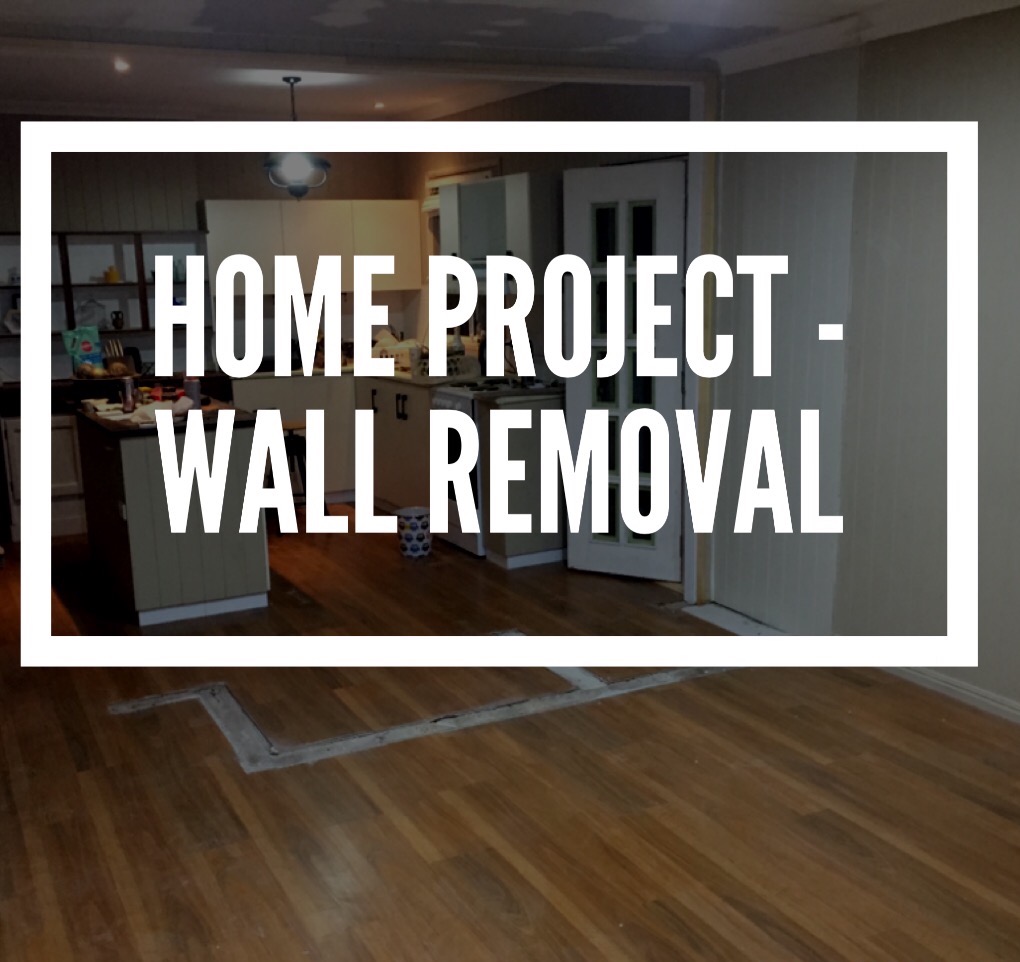
One area that I thought would make an immediate improvement was the removal of a wall between the living and kitchen. An open-plan kitchen living area is more aligned to the preference of today and also creates the illusion of more space.

My first point of call was to call in a builder to discuss the wall removal. I was all excited about grabbing a sledgehammer and smashing down the wall but was fairly certain it would be load bearing. Sure enough, it was. That took the project out of my hands as I don’t have the construction knowledge to install of load bearing beam. I also didn’t want any issues with insurance or selling the property at a later date. I needed a professional.

Professionals cost money though. What I could negotiate on was the level of finish. If I was prepared to fill the gaps and paint, I would almost halve the cost of the job. I am not a total DIY incompetent, so I asked that the wall be removed and supporting framework installed. I would finish the job up to make it look pretty. The end quote was $4500.

Though I’m no expert, I assume it was a relatively minor job as it was complete in 2 days. based on how it looked after the first day, I can’t imagine it took more than a few hours the second day it knock it over.

As the photos demonstrate, removing the wall drastically increased the illusion of space. Actually, it’s not entirely an illusion as the kitchen cupboards and faux brick wall were several feet thick, so I have literally gained extra space.

  • There are now gaps in the floating floor. I’m not a huge fan of the colour of the flooring though, so I may end up replacing the lot. I can live with it for now though.
  • I have lost kitchen storage. I normally live with about 2 plates and a couple of cups, so I don’t need much room but as far as resale goes, I need to add more.
  • The now see the dated kitchen all the time. It was ‘out of sight, out of mind’ before. Now I can’t not see it. It’s functional but ugly. A kitchen renovation is now on the list of things to do.

The positives:

  • The sense of space. I have a small house and space is premium. Instead of walking in the front door into a small room, now I walk into a nice open space.
  • More layout options. I have more room to space out my furniture. For one, I can now place my TV against a wall so it’s not the first thing you see as you walk in the house.
  • Much more light in the kitchen/dining area. My kitchen is South facing. In Australia, that is the aspect that receives the least light. Now I gain the light from the North facing window into the kitchen area.
  • I have added value. If I haven’t at least added the value of the renovation, I would be amazed. I consider the change has vastly improved the saleability of the home.
  • I like it! That was the primary purpose of the reno. I wanted to enjoy it more than before. it makes me smile.

Maybe I half expected that the wall removal would do the job and I would be satisfied to leave it at that. I would be fooling myself also, I can’t sit stagnate without change. As indicated above though, now I want to change the kitchen and review the flooring.

More saving and more projects to come.

A drop in the home loan ocean – eBay wins

I posted a while back that I had listed a few items on eBay to create more dollars to contribute to my dream of early retirement.

I would be reluctant to call this a ‘side hustle’ as I’m not listing enough volume to make a continual or substantial amount. Regardless, I have had a few successes that have added a few dollars to the coffers.

Trestle Leg desk

I picked this up for free from someone that just had too much stuff. Other than being dusty, it was in good, solid condition. The person lived minutes from my gym, so I wasn’t out of pocket for petrol to pick it up.

I didn’t do a whole lot to the desk. I sanded the legs for no other purpose then making it a bit different (and it was the only surface that was real wood) and cleaned up all the dusty areas.

I ended up selling for $31.51. Not a terrific amount but as it was free and I had put little time into it, I consider it a success.

Dining chairs

The chairs had obviously seen better days. The wood was faded and had some black ‘muck’ on them. However, they were solid and the vinyl was in dusty but good condition. I liked the mid-century style of the chairs, so paid up the huge sum of $6.00 for both of them.

I dismantled the chairs and scrubbed the black substance off. I sanded the lacquer back and found a really lovely grain underneath. After applying some Scandanavian oil to them, they looked great. I was very pleased with the finished product.

Overall, with the purchase of the chairs and products used to clean them up, I wasn’t out considerably financially. I did put in many hours into the restoration though. I decided to list at $20.00 with the hope of making $50 or $60.

Well, I got lucky. Two bidders went crazy against each other and after one day, the amount was over $100.00. At the end of bidding (with a single bid from another person), the chairs went for $162.50! I was actually a bit embarrassed at the winning price but I reminded myself of how much time I had put into the chairs.

A bonus also is that I found two more of the chairs that I am fixing now. The winning bidder has already expressed their interest, so I have a ready sale when I get them completed.

Vintage recliner

I bought two of these chairs for $60.00 a few months back, with the intention of keeping one for myself.

Both chairs were tired and the vinyl seating was weathered and cracked in parts. I managed to salvage enough of the vinyl from both chairs to make one decent chair. I disassembled one of the recliners and sanded back all the old lacquer. There was also some sticky gunk under all the vinyl, which took some elbow grease to get off. After oiling, the chair looked very impressive (in my opinion).

I had spent quite some time restoring the chair but little in the way of actual cost. I listed again at $20.00, with the hope of making around $100.00.

Bidding started off fairly strong and the price was over $60.00 in one day. This impressive start, with the fact that I had a ‘watch list’ of over 50 people after 2 days, made me start to see dollar signs in my eyes. Maybe $200-$300 was possible!

Well, bidding ended with $82.00. Still a win but I still felt somewhat disappointed as I had set myself up for something in the hundreds. Really though, I had only paid $30.00 dollars for the chair, so more than doubling my money was a good outcome. And I still have another chair to keep!

Overall results

  • Desk                     $0.00
  • Chairs                  $6.00
  • Recliner               $30.00
  • Product used       $15.00 (approx)
  • Sold                       $276.01
  • Profit                   $225.01

I’m not including the significant labour costs involved as I really enjoy the process I would be doing it in my spare time anyway. I also haven’t considered the eBay fees either, which will reduce my in-pocket. Still, I have additional money that I can pay off against my home loan that I didn’t have before. Only a drop in the ocean really but every bit counts.


Vintage Recliner Restoration

A few weeks ago I came across an ad on Gumtree advertising two vintage recliners. They were advertised at $60.00 each. The photos were dark and unclear but there was just enough there to make me think that the chairs were something different.

I contacted the seller to ask if I could buy one of the chairs. She informed me that the chairs were already taken. That’s life, so didn’t think much more of it. The next day, however, I received a message that the buyer had pulled the pin and the chairs were available again if I wanted them. What’s more, the seller had identified some issues with the second chair and I could have both for $60.00. Good deal I thought and went to collect.

The chairs were in a bit of a sad state. They had been used as outdoor chairs. Thankfully, they were under some cover, so the damage was only skin deep. One chair was structurally sound but the other chair had a broken leg.

I got the chairs home and made a decision to fix the good one up first. I found a makers mark, indicating that the chairs had been constructed in 1977. The vinyl on the chairs was in relatively good condition given the age and that they had been outside but some splits were visible. I picked the best pieces from both chairs and ended up with good vinyl for one chair that had the look of aged leather.

IMG_0905

I pulled apart the good chair as much as possible without interfering with the joints. The vinyl had left a nasty black funk on some of the wood, which took elbow grease with soap and water to remove. There was inconsistent fading on the armrests where the vinyl had been. Overall though, the chair was solid with only minor bumps and scratches.

I proceeded with removing the lacquer. Firstly with paint remover and then with fine grade sandpaper. I was very pleased to find a lovely grain underneath that just needed some love. I willnote that, by definition, what I am doing is refinishing and not restoration but I consider the term is used for both these days.

After completing the sanding, I ran over the wood with fine steel wool. Even at this stage, the beauty of the chair was starting to become clear. I then coated the chair with two coats of Danish oil. I prefer to put the oil on before I reassemble to make sure all surfaces are coated equally.

I started to put the chair back together to find that the vinyl armrests were a little too retro. The look without the armrests was far more vintage/mid-century and far more attractive.

I have decided to list the completed chair for sale. I have full confidence I will get my money back and more as it has come up so nicely. A bit more money to contribute to my retirement fund I hope.

I have kept the damaged chair to repair and restore. As it has the worst of the vinyl, I intend to recover in fabric for a mid-century aesthetic. Upholstery is not currently amongst my skill sets as yet, so we will have to wait and see on that one. Once complete, I will post for critique.

Tips for buying second-hand furniture online

Over the years, I have purchased a large amount of furniture online. Some have been wins, while others have ended up on the curbside.

Through hit and miss, I have found some tips for being more consistently successful with my online furniture purchases.

  • Read description thoroughly

I look for comments that may indicate issues with condition that aren’t apparent in the photos. Additionally, I look for information that I consider should be included in the description. I don’t assume that what I think it means is what it means.

Example 1

2 chairs in all photos. Description used the plural chairs. I assumed I was bidding for both chairs. I won the auction and was pleased with the price. On arranging collection, I was advised the auction was for each chair. In this instance, I advised I would not proceed with the sale as the advertisement was unclear and ambiguous. I always confirm now what it is for sale if any doubt before committing to buy.

Example 2

The description stated that the item was a mahogany cabinet. The photos were not perfect but they did seem to support the description of mahogany. On collection, found the item was mahogany wood veneer that needed repair. As I buy now to restore and sell, the restoration cost outweighed the possible sale so it ended up a failure.

  • Don’t use your iPhone to check photos

The quality of photos on mobile phones is very clear but the size is far too small to see detail. Use your laptop or tablet. Open the photo to full screen and enlarge areas for detail.

Example

Purchased a chair for restoration. Looked at photos on my iPhone and while the chair looked shabby, it was sure it could be restored. On arriving for pick up, it was apparent that there were several irreparable (at my skill level anyway) splits in the wood. I reviewed photos on my iPad when I arrived home and, on closer examination, the splits were apparent. There was little to reclaim from the chair, so it ended up on the curbside. My mistake and lesson learnt.

  • Be aware of poor quality photos or very few photos

Many times, I see very poor quality photos accompanying online listings. With the quality of photos capable even with a mobile phone now days, this is almost inexcusable. The same is the case with taking one photo only. It takes seconds to take and upload the photo. I am cautious of buying anything with poor quality or minimal photos. It may simply mean the person is incompetent with cameras or they might be hiding something.

Example 1

The bad. One photo with listing. Fixed price and price seemed fair. Didn’t negotiate price and arranged collection. Found that the rear legs on the item had considerable dry rot. The legs were beyond recovery and required replacement. The value wasn’t there to restore, so lost money with that buy.

Example 2

The good. Two photos of a dresser. Looked like the photo had been taken with a potato while jumping on a trampoline. I could still make out the overall shape of the dresser and took a punt. The dresser was fantastic. In perfect shape and only needed a dust. I could have flipped for quadruple the price but ended up keeping that one for myself.

  • Have a tape measure handy

For some items, it is necessary to check the measurements. This applies to items such as cabinets, side tables, coffee tables and dressers. This is of particular importance to items you to intend to keep. Check the measurements and then use tape measure to ensure that the size of the item suits your needs. Measurements are important also when considering what you can fit in the back of your SUV or hatchback. Hiring a trailer or van really starts to add up.

If there are no measurements in the description, send a message to ask for them. If they don’t respond, it is probably in your best interests that you do not commit to buy.

Example

Found a very nice mid century sideboard for auction. Lots of clear photos and it was in great condition. Ended up winning for a reasonable price. On collection, realised that photos had been taken at a distance and sideboard was huge and weighed a ton. Somehow managed to get home but it totally overpowered the room. The dimensions were listed in the description, however, I bought purely on appearance in photos.

Point 2. The item turned out to be veneer covered MDF. I ‘assumed’ it was wood but turned out to be an average quality piece.

I subsequently dropped the sideboard when moving it down some stairs and the MDF crushed. Ruined piece and not something that could be salvaged for resale.

  • Set your limit with auctions

It’s so easy to get caught up in an auction of any type when you really want something. An extra dollar ends up being an extra $10-$20 and you have gone outside your limit. Some items are ‘must haves’ and you pay what you have to but you end up chasing your tail.

I won’t include examples on this as I have done it too many times to mention. Just set a limit and are comfortable and stick to it. If it sells for more, than obviously it wasn’t meant to be yours.

Well, that’s some of my tips and examples of some of my mistakes. I am comfortable in saying that the failures outweigh the wins but less so now with experience.

Use your mistakes as opportunities to learn.


Mid-Century Dining Chairs Restoration

I woke early Saturday to drive out to the ‘Tip Shop’. The Tip Shop only opens on Saturdays and sells items that have been discarded at the dump. Money from sales goes to charity.

I had never been to the Tip Shop, even though it is only a 10 minute drive from my home. In my mind, I expected that items would be broken and beyond repair. However, as I keen to pursue my interest in recycling/upcycling furniture for sale, I drove out for a look. I had heard that the best items were picked up early in the morning, so I arrived shortly after open time.

What I found was a warehouse crammed with everything conceivable and streets full of cars. People were milling around everywhere to find a treasure. The items inside (and spilling outside) were in remarkable serviceable condition. A lot only needing a bit of spit and polish to be used.

As I’m only new to the game, I decided on investing initially in a couple of chairs only. The chairs were a bit tired in appearance with faded lacquer on the wooden frame. What attracted me to them was that the vinyl seat and backrest were in good condition and that the chairs had a mid-century style. Also attractive was the $6.00 purchase price for both. You can’t buy $5.00 with 6 bucks, so I was happy with the buy.

IMG_0949

I have decided that my goal is to find items within 10kms of my home. I don’t want to lose potential profit in petrol costs and time. I also have a low budget of $20 or under, so any loses are minimised. If I start making money, I may review the price limit if I deem the item is good value for money.

On arrival home with my new chairs, I had a quick look on Gumtree and located a desk for sale that was free. Free is my favourite price, so I called only to find that someone else had already expressed interest and would be around to collect. No big deal I thought, I will work on the chairs.

The remainder of the day I spent dismantling the chairs and sanding them. Under the faded and chipped lacquer I found wood with a pleasing grain. I oiled the chairs and ran some soap and water over the vinyl and they came up a treat. I listed them on eBay starting at $20.00. With sandpaper and oil, I probably have $10.00 invested in total, so doubling my money should be the worst result in my opinion. I will disregard labour costs as I would definitely run a deficit, even a base labour rates. That said, I enjoyed the restoration process, so it wasn’t a wasted day for me.

While watching TV that night, I received a text from the person giving away the desk that the interested ‘buyer’ had disappeared. I arranged to pick up early on Sunday morning.

The desk was a minor disappointment in that it was mostly MDF with a wood like coating. Other than being dusty though, it was solid and had almost no damage. I drove away with it in my ute trying to think how I could make the desk a bit more desirable.

For some reason, I don’t like to buy and sell straight away to make a profit. Somehow, I consider it unethical and that I should input time and effort into making the item better than when I purchased it. As the legs on the desk were wood, I sanded them back and covered them with a coat of poly.

In hindsight, taking the flat-pack legs apart without taking detailed photos first wasn’t the best idea, as reassembling the trestle leg setup took almost as long as the sanding did. In the end though, I was pleased with the outcome. I posted the desk on eBay with a starting price at $20.00 also. All up I probably have no more into the desk than $5.00.

IMG_3628

Anyway, the chairs and the desk have been listed and I await the outcome in 5 days. Here’s hoping for a profitable financial outcome. Ideally, I would like to generate enough money with my furniture sales to cover my weekly grocery bill. I eat a lot, so this is no small order, so we will see how we go.

Saving dollars & cents – Do what you love and..hopefully..money will follow

Filling my head almost constantly lately has been thoughts about how I would accrue additional money to fund my dream to retire early.

I have honestly found it quite frustrating that nothing suitable to my skills was coming to mind. I don’t have any particular skills that I could utilise to increase my savings. Additionally, as I work on a rotating shift, it’s not really that practical to schedule in a second job.

Last night, I was browsing eBay and Gumtree (I believe it’s equivalent to Craigslist in the US) for second-hand furniture. I’m always on the lookout for an item that needs a bit of TLC or something quirky. I realised that I browse these sites every day and I generally spend my time away from work upcycling and restoring furniture. I have always kept the item to add or replace items I have already in my home.

It occurred to me that I should attempt to make some extra income doing what I do anyway for fun. Keep an eye out for run down furniture, give it a sand, make minor repairs, oil and generally present well in photos and see how I go.

Initially, I’m looking at pursuing this with low cost items or finds dumped at the side of the road. This way I’m not taking a big financial risk should I make nothing or lose some money. Should I find that I’m generating a good return for my individual restoration style (and my admittedly limited skills), I will start looking for bigger and more expensive projects.

Today I purchase a cute little dining table for $10.00. Totally solid but perhaps just a little on the tired side. I also picked up an old chamber pot seat for $20.00. Definitely on the quirky side and probably a limited market but I will tidy up and see if there is a dollar to be made. Ideally, I would like to double my money but we will see how we go.

Only started today, so will give it a red hot go and post my efforts and outcomes when I get some things sold…or not.